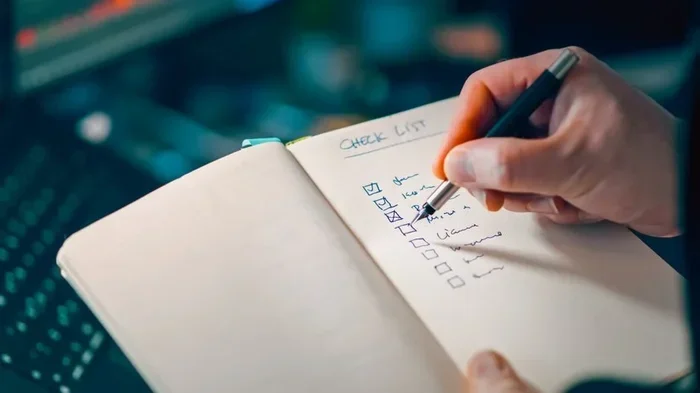
The Ultimate Checklist for Project Managers to Stay on Track
A solid checklist for project managers keeps every project on track from start to finish. This guide covers planning, execution, monitoring, and closing with practical steps you can use today. You will learn how to manage scope, assign resources, track milestones, and avoid common project pitfalls. Whether you are new to project management or looking to sharpen your skills, this checklist will help you deliver projects on time and on budget.
Running a project without a plan is like driving blindfolded. You might move forward, but you will not know if you are heading in the right direction. A checklist for project managers changes all of that. It gives you a clear roadmap, keeps your team aligned, and ensures nothing falls through the cracks. In this guide, we walk you through every step of building and using a project management checklist that actually works.
Project management is not just about deadlines. It is about people, processes, and staying organized under pressure. A good project management checklist covers everything from the first idea to the final handoff. Whether you are managing a small team project or a large organizational initiative, the principles stay the same. Let us dive into the details and help you stay on track every step of the way.
Key Takeaways
- Clear Planning: A well-built checklist for project managers sets the foundation for every successful project.
- Task Tracking Matters: Breaking work into smaller tasks keeps your team focused and accountable.
- Risk Management Saves Projects: Identifying risks early prevents costly surprises later.
- Communication is Key: Regular check-ins and status updates keep everyone aligned.
- Closing Properly Matters: A strong project closeout ensures lessons are captured and stakeholders are satisfied.
- Use the Right Tools: Digital tools and platforms make checklist management easier and more efficient.
- Stay Flexible: Adapting your checklist as the project evolves keeps it relevant and useful.
📑 Table of Contents
- Why Every Project Manager Needs a Checklist
- Step 1: Define the Project Scope and Goals
- Step 2: Break Down Tasks and Create a Timeline
- Step 3: Assign Resources and Set Up Communication
- Step 4: Monitor Progress and Manage Risks
- Step 5: Execute, Review, and Close the Project
- Quick Tips for Using Your Checklist Effectively
- Common Mistakes to Avoid
- Expert Insights on Project Checklists
- Conclusion
Why Every Project Manager Needs a Checklist
A checklist for project managers is more than a to-do list. It is a strategic tool that keeps your project organized and moving forward. Without one, tasks get missed, deadlines slip, and team members get confused about who is doing what. A checklist removes that chaos and brings clarity to every phase of your project.
Here is why a checklist matters so much:
- It prevents missed tasks. Even the best planners forget things. A checklist catches what slips through.
- It improves team accountability. When tasks are written down, everyone knows their responsibilities.
- It saves time. You spend less time figuring out what to do next and more time actually doing it.
- It reduces stress. A clear plan means fewer surprises and less last-minute panic.
- It supports better decision-making. With a checklist, you can quickly see where things stand and adjust accordingly.
Think of your checklist as your project safety net. It catches errors before they become big problems. It also helps you maintain project organization throughout the entire lifecycle. Many experienced managers say their checklist is the single most important tool they use every day.
Step 1: Define the Project Scope and Goals
Every great project starts with a clear definition of what success looks like. Before you check off a single task, you need to know exactly what you are trying to achieve. This is where goal setting and project scope definition come in. Without these, your project planning will lack direction.
Set Clear Objectives
Start by asking the big questions. What problem does this project solve? What is the desired outcome? Who are the stakeholders? Write down your objectives in simple, measurable terms. Use the SMART framework: Specific, Measurable, Achievable, Relevant, and Time-bound.
For example, instead of saying “improve the website,” say “increase website traffic by 20% in three months.” This kind of clarity makes your project deliverables much easier to define and track.
Define the Scope Boundaries
Scope creep is one of the biggest enemies of project success. It happens when new requirements keep getting added without adjusting the timeline or budget. Your checklist should include a clear scope statement that outlines what is in and what is out of the project. Share this with all stakeholders early on to avoid misunderstandings later.
Step 2: Break Down Tasks and Create a Timeline
Once you know the scope, it is time to break the project into smaller, manageable pieces. This is where task tracking and project scheduling become essential. A well-structured project timeline shows your team exactly what needs to happen and when.
Use a Work Breakdown Structure
A Work Breakdown Structure (WBS) is a powerful way to organize your project. It breaks the big goal into smaller phases, and each phase into individual tasks. This makes project execution much smoother because your team can focus on one piece at a time.
Here is how to build a simple WBS:
- Start with the final project goal at the top.
- Break it into major phases or milestones.
- Divide each phase into specific tasks.
- Assign each task to a team member with a deadline.
Set Milestones and Deadlines
Project milestones are checkpoints that tell you how the project is progressing. They give your team a sense of accomplishment and help you spot delays early. Include milestone reviews in your checklist to make sure the project stays on the project timeline. For instance, you might set a milestone at the end of each phase to review progress and adjust the plan if needed.
When setting deadlines, always build in a little buffer. Unexpected delays happen in every project. A deadline management approach that includes extra time will save you from constant rushing and stress.
Step 3: Assign Resources and Set Up Communication
A project is only as good as the team executing it. Proper resource allocation and clear communication are the backbone of any successful project. Your checklist for project managers should include steps for both.
Allocate Resources Wisely
Look at each task and ask: Who has the skills to do this? How much time do they have? What tools do they need? Assign roles clearly so no one is overloaded or confused. Good resource allocation prevents burnout and keeps your team motivated.
Consider using a simple RACI matrix. It defines who is Responsible, Accountable, Consulted, and Informed for each task. This removes ambiguity and keeps everyone on the same page.
Establish Communication Channels
Stakeholder communication is critical. Set up regular check-ins, status updates, and reporting schedules. Decide which tools your team will use for day-to-day communication. Whether it is email, chat platforms, or project management software, consistency matters.
Pro tip: Include a communication plan in your checklist. It should outline who gets what information, how often, and through which channel. This simple step reduces confusion and keeps everyone informed.
Managing project data and files securely is also important. If your project involves sensitive documents, consider how you will protect them. For example, some teams use encryption tools to secure project files, especially when working with confidential client data. You can explore how tools like BitLocker recovery key management can help secure your project data at the device level.
Step 4: Monitor Progress and Manage Risks
Planning is only half the battle. The other half is staying on top of progress and handling problems as they come up. This is where progress monitoring and risk management shine. A strong checklist for project managers always includes regular check-ins and risk reviews.
Track Progress Regularly
Set a rhythm for checking in on your project. This could be daily stand-ups, weekly status meetings, or bi-weekly reviews. Use status reporting to share updates with stakeholders and keep everyone aligned.
Here are simple ways to track progress:
- Use a Kanban board to visualize task status.
- Update your project tracker at the end of each day.
- Hold brief weekly meetings to review completed and pending tasks.
- Compare actual progress against the project timeline to spot deviations early.
Identify and Manage Risks
Every project has risks. The key is to find them early and plan for them. Include a risk assessment step in your checklist. Ask your team: What could go wrong? How likely is it? What would the impact be? What is our backup plan?
Common project risks include:
- Scope changes from stakeholders.
- Resource shortages or team member absences.
- Technical issues or tool failures.
- Budget overruns.
- Timeline delays due to dependencies.
By listing these risks in your checklist, you are prepared when they happen. This proactive approach to risk management is what separates good project managers from great ones.
Step 5: Execute, Review, and Close the Project
The final phase of any project is execution, review, and closeout. This is where all your planning pays off. A strong project workflow ensures that execution goes smoothly and the closeout is thorough.
Keep the Workflow Moving
During execution, focus on keeping things moving. Remove blockers quickly, support your team, and maintain open communication. Your project tracking tools should be updated regularly so everyone has the latest information.
Many teams store project files and resources in the cloud for easy access and collaboration. If your organization is moving project assets to cloud platforms, understanding cloud migration best practices can make the transition smoother. Check out our guide on approaches for cloud migration to learn more about planning and executing a successful migration.
Conduct a Project Review
Once the project is complete, do not just move on to the next one. Take time to review what went well and what could be improved. This is called a project retrospective, and it is incredibly valuable for future projects.
Ask your team these questions during the review:
- What went well during this project?
- What challenges did we face, and how did we handle them?
- What would we do differently next time?
- Did we meet our original goals and deadlines?
- How was the stakeholder experience overall?
Close the Project Properly
A proper project closeout includes finalizing deliverables, getting stakeholder sign-off, and documenting lessons learned. Add a closeout checklist to your project management checklist so you never skip this important step. Celebrating wins with your team is also a great way to end a project on a positive note.
Quick Tips for Using Your Checklist Effectively
Here are some practical tips to get the most out of your checklist for project managers:
- Keep it visible. Share your checklist with the whole team so everyone knows the plan.
- Update it regularly. A stale checklist is useless. Make updates part of your daily routine.
- Use digital tools. Apps like Trello, Asana, or Monday.com make checklist management easier and more collaborative.
- Keep it simple. Do not overcomplicate things. A clear, concise checklist is more effective than a lengthy document.
- Review before meetings. Always glance at your checklist before status meetings to stay prepared.
- Celebrate completed items. Small wins keep the team motivated and engaged.
Common Mistakes to Avoid
Even experienced project managers make mistakes with their checklists. Here are some common pitfalls to watch out for:
- Skipping the planning phase. Jumping straight into execution without a clear plan leads to confusion and delays.
- Ignoring risks. Pretending everything will go smoothly is a recipe for disaster. Always plan for the unexpected.
- Overloading the checklist. Too many tasks make the checklist overwhelming. Keep it focused and actionable.
- Forgetting to update stakeholders. Poor communication causes more project failures than poor planning.
- Skipping the closeout. Ending a project without a proper review means you miss valuable learning opportunities.
Avoiding these mistakes will make your project management checklist far more effective and your projects more successful.
Expert Insights on Project Checklists
seasoned project managers agree that a checklist is the foundation of project success. According to the Project Management Institute, projects with clear checklists and defined processes are 30% more likely to meet their goals on time and within budget. The key is not just creating the checklist but using it consistently throughout the project lifecycle.
One senior project manager shared this insight: “A checklist is not just a document. It is a living tool that evolves with your project. The best managers update theirs daily and use it as a guide, not a rigid rulebook.” This mindset shift from rigid checklist to flexible guide can transform how you manage projects.
Another expert emphasizes the importance of project organization: “When everything has a place and a purpose, your team can focus on doing great work instead of figuring out what to do next.” This philosophy should be at the heart of every checklist for project managers.
Conclusion
A checklist for project managers is one of the simplest yet most powerful tools in your toolkit. It brings structure to chaos, clarity to complexity, and accountability to your team. From defining scope and setting goals to tracking progress and closing projects, a well-designed checklist covers every phase of the project lifecycle.
Use the steps in this guide to build your own project management checklist today. Start small, keep it practical, and update it as you go. Over time, you will notice fewer missed tasks, better team collaboration, and more successful project deliveries. The best project managers are not the ones with the most experience. They are the ones with the best systems and processes in place. Let your checklist be that system.
Stay organized, stay focused, and let your checklist do the heavy lifting. Your projects and your team will thank you for it.
Frequently Asked Questions
What is a checklist for project managers and why is it important?
A checklist for project managers is a structured list of tasks and steps that guide a project from start to finish. It is important because it prevents missed tasks, improves team accountability, and keeps projects on track. A good checklist serves as your project safety net and helps you deliver results consistently.
How often should I update my project management checklist?
You should update your checklist regularly, ideally at the end of each day or week. Regular updates keep your project tracking accurate and ensure nothing falls through the cracks. A stale checklist can lead to confusion and missed deadlines.
What should be included in a project management checklist?
A solid checklist should include scope definition, task breakdown, resource allocation, risk assessment, progress tracking, and project closeout steps. You can also add communication plans and milestone reviews. The key is to tailor it to your specific project needs.
Can a checklist help with risk management in projects?
Absolutely. Including a risk assessment step in your checklist helps you identify potential problems early. This proactive approach allows you to create backup plans and avoid surprises. Risk management is one of the most valuable aspects of a comprehensive project checklist.
What tools work best for managing project checklists?
Popular tools include Trello, Asana, Monday.com, and Microsoft Planner. These platforms make it easy to create, assign, and track tasks. Choose a tool that fits your team size and workflow. The best tool is the one your team will actually use consistently.
How do I know if my project checklist is working?
If your checklist is working, you will notice fewer missed deadlines, better team communication, and smoother project execution. Regularly review your project milestones and compare them against your actual progress. If things are on track, your checklist is doing its job.