How to Open BIOS on Windows 11 During Computer Startup
Learning how to open BIOS on Windows 11 during startup is simpler than most people think. You can use keyboard keys like F2, Del, or F10 right when your PC turns on. Alternatively, Windows 11 offers a built-in path through Advanced Startup Settings. This guide covers every reliable method, brand-specific keys, and practical tips to help you access your firmware settings with confidence.
If you have ever wanted to change how your computer boots or tweak hardware settings, you need to know how to open BIOS on Windows 11. The BIOS, or Basic Input/Output System, is the firmware that starts your computer before Windows loads. Think of it as the brain that wakes up your hardware every time you press the power button.
Many people feel intimidated by the idea of entering BIOS. They worry they will break something or get lost in a confusing menu. The truth is, accessing BIOS on Windows 11 is straightforward once you know the right steps. Whether you use a Dell, HP, Lenovo, or custom-built PC, this guide walks you through every method clearly and simply.
In this article, you will learn multiple ways to enter BIOS setup on Windows 11. We will cover keyboard shortcuts, Windows built-in tools, and brand-specific keys. You will also discover what you can do once you are inside and how to avoid common mistakes. By the end, you will feel confident accessing your firmware settings anytime you need to.
Key Takeaways
- Multiple methods exist: You can open BIOS using keyboard keys, Windows Settings, or the Advanced Startup menu.
- Brand-specific keys matter: Different PC manufacturers use different keys like F2, Del, F10, or Esc.
- UEFI replaced traditional BIOS: Modern Windows 11 PCs use UEFI firmware, which offers more features and a better interface.
- Timing is critical: You need to press the key repeatedly right after turning on your computer.
- BIOS settings affect performance: You can change boot order, enable secure boot, and adjust hardware settings from the firmware menu.
- Common mistakes cause frustration: Missing the timing window or pressing the wrong key are the top issues users face.
- You can access BIOS from inside Windows: The Settings app and Advanced Startup options let you bypass keyboard shortcuts entirely.
📑 Table of Contents
- What Is BIOS and Why Do You Need to Access It?
- How to Open BIOS on Windows 11 During Startup
- Common BIOS Keys for Different PC Brands
- What You Can Do Inside BIOS Settings
- Common Mistakes to Avoid When Accessing BIOS
- Expert Tips for a Smooth BIOS Experience
- When Should You Access BIOS on Windows 11?
- Frequently Asked Questions
- Conclusion
What Is BIOS and Why Do You Need to Access It?
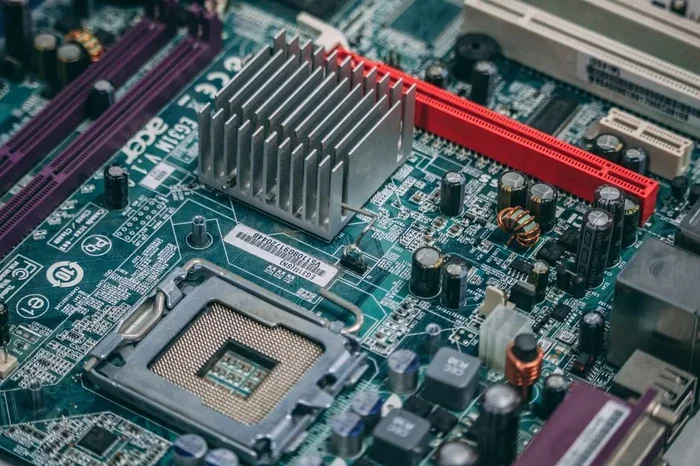
BIOS stands for Basic Input/Output System. It is the first software that runs when you turn on your computer. Its job is to check your hardware, load the operating system, and manage basic system settings. On modern Windows 11 PCs, BIOS has evolved into something called UEFI, or Unified Extensible Firmware Interface.
BIOS vs UEFI: What Is the Difference?
Traditional BIOS uses a simple text-based interface. UEFI is more modern and offers a graphical menu with mouse support. Most Windows 11 computers today use UEFI firmware. When people say “BIOS,” they usually mean the UEFI settings on newer machines. Both serve the same core purpose, but UEFI is faster and more feature-rich.
You might need to access your firmware settings for several reasons. Maybe you want to change the boot order so your PC starts from a USB drive. Perhaps you need to enable or disable secure boot. Some users adjust fan speeds or overclock their CPU from this menu. Whatever your reason, knowing how to get there is the first step.
How to Open BIOS on Windows 11 During Startup
The most common way to enter BIOS is by pressing a specific key while your computer starts up. This method works on almost every PC. The key you need to press depends on your motherboard or PC brand. Let us walk through the process step by step.
Method 1: Using the BIOS Key at Startup
Here is how to open BIOS on Windows 11 using the keyboard shortcut method:
- Restart or turn on your computer. Make sure it is completely powered off, not just sleeping.
- Watch the screen closely. As soon as you see the manufacturer logo, start pressing the BIOS key repeatedly.
- Press the key every one or two seconds. Do not hold it down. Just tap it steadily.
- You will enter the BIOS menu. If you see a setup screen with options, you made it!
- Use your arrow keys to navigate. Most BIOS menus do not support a mouse.
The tricky part is timing. You have a small window, usually just a few seconds, to press the key. If you miss it, Windows will start loading normally. Simply restart and try again. It may take a few attempts the first time.
Method 2: Through Windows Advanced Startup Settings
What if you cannot catch the BIOS key in time? Windows 11 has a built-in way to access firmware settings from inside the operating system. This method is perfect for people who find the keyboard shortcut too fast.
- Open Settings. Press Windows key + I to launch the Settings app.
- Go to System. Click on System in the left sidebar, then select Recovery.
- Click Restart now. Under the Advanced startup section, hit the Restart now button.
- Choose Troubleshoot. After your PC restarts, select Troubleshoot from the blue menu.
- Select Advanced options. Then click UEFI Firmware Settings.
- Click Restart. Your PC will reboot directly into the BIOS menu.
This method is very reliable because it does not depend on timing. It works on every Windows 11 PC that supports UEFI firmware settings. If you do not see the UEFI Firmware Settings option, your PC might use a different label, such as Firmware Settings. Look for anything related to BIOS or firmware.
Method 3: Using the Command Line
For users who like a technical approach, you can also use the Command Prompt to restart into firmware settings. Open Command Prompt as an administrator and type the following command:
shutdown /r /o /f /t 00
This command restarts your PC and opens the Advanced Startup menu directly. From there, follow the same steps as Method 2 to reach the BIOS settings. This trick is handy if you prefer keyboard workflows or need to access BIOS remotely.
Common BIOS Keys for Different PC Brands
Every PC manufacturer uses a specific key to enter BIOS. Knowing your brand’s key makes the process much easier. Here is a quick reference table to help you find the right key.
| PC Brand | BIOS Key |
|---|---|
| Dell | F2 or F12 |
| HP | F10 or Esc |
| Lenovo | F2 or Fn + F2 |
| ASUS | F2 or Del |
| Acer | F2 or Del |
| MSI | Del |
| Gigabyte | Del or F2 |
| ASRock | Del or F2 |
| Microsoft Surface | Volume Up button |
| Custom Build (PC) | Del or F2 |
If your brand is not listed, try Del or F2 first. These two keys work on the majority of motherboards. Some newer PCs show a prompt on the startup screen that says “Press [key] to enter setup.” Keep an eye on your screen during boot-up.
For Surface devices, the process is slightly different. You need to hold the Volume Up button while pressing the power button. Release the Volume Up button when the Windows logo appears. This will take you straight into the UEFI firmware settings.
What You Can Do Inside BIOS Settings
Once you successfully enter BIOS, you will see a menu with many options. Do not worry if it looks overwhelming at first. Most people only need a few specific settings. Here are the most common things you can do from the BIOS menu.
- Change boot order: This lets you choose which device your PC boots from first. You can set a USB drive or CD to load before your hard drive.
- Enable or disable secure boot: Secure boot helps protect your PC from malware. You may need to turn it off to install certain operating systems.
- Adjust fan speeds: Some BIOS menus let you control how fast your fans spin. This is useful for managing noise and temperature.
- Overclock your CPU: Advanced users can push their processor beyond its default speed for better performance.
- Change virtualization settings: If you use virtual machines, you need to enable Intel VT-x or AMD-V from BIOS.
- Update firmware: Some BIOS menus include a built-in option to check for and install firmware updates.
- View system information: You can see your CPU model, RAM speed, and motherboard details from the main BIOS screen.
Remember to be careful when changing settings. If you are not sure what a setting does, it is best to leave it alone. Always take a photo or write down your original settings before making changes. This way, you can easily restore them if something goes wrong.
Common Mistakes to Avoid When Accessing BIOS
Many people run into problems when trying to enter BIOS on Windows 11. Most of these issues are easy to avoid. Here are the most common mistakes and how to prevent them.
Mistake 1: Pressing the key too late. The BIOS window only appears for a brief moment after you turn on your PC. If Windows has already started loading, you missed the window. Restart and try pressing the key earlier.
Mistake 2: Pressing and holding the key. You should tap the key repeatedly, not hold it down. Holding a key can sometimes cause your keyboard to get stuck in a repeat mode, which confuses the boot process.
Mistake 3: Using the wrong keyboard. Some wireless keyboards or Bluetooth keyboards do not register during the early boot phase. If you are struggling, try using a wired USB keyboard instead. It is the most reliable option for entering BIOS.
Mistake 4: Fast Startup interfering with access. Windows 11 has a feature called Fast Startup that can sometimes bypass the BIOS key prompt. To disable it, go to Control Panel > Power Options > Choose what the power buttons do > Change settings that are currently unavailable. Then uncheck “Turn on fast startup.”
Mistake 5: Confusing BIOS with Boot Menu. The Boot Menu and BIOS are not the same thing. The Boot Menu lets you choose which device to boot from once. BIOS is where you change permanent system settings. Make sure you are entering the right menu for your needs.
Expert Tips for a Smooth BIOS Experience
Getting into BIOS is only half the battle. Here are some expert tips to make the whole process smoother and more productive.
First, always plug in a wired keyboard when you need to access BIOS. Wireless keyboards sometimes have a delay that causes them to miss the boot window. A simple USB keyboard eliminates this problem completely. It is the single easiest way to ensure you can enter BIOS every time.
Second, take notes before you change anything. Use your phone to photograph the default BIOS screen. If you ever need to revert settings, you will have a clear reference. This simple habit saves a lot of headaches, especially when you are experimenting with overclocking or boot order changes.
Third, keep your motherboard firmware updated. Manufacturers release BIOS updates that fix bugs, improve compatibility, and boost performance. Check your motherboard manufacturer’s website periodically for updates. Just be careful to download the correct version for your specific model.
Fourth, learn the quick exit option. Most BIOS menus have a “Save & Exit” or “Discard & Exit” choice at the bottom. If you accidentally change something, you can quickly undo it by choosing the discard option. This keeps your system safe and stress-free.
Finally, do not be afraid to explore. BIOS menus are designed to be user-friendly, even if they look technical at first glance. Spend a few minutes clicking through the different tabs. You will quickly learn where things are and what they do. The more you use it, the less intimidating it becomes.
When Should You Access BIOS on Windows 11?
Not every Windows 11 user needs to enter BIOS regularly. However, certain situations make it essential. If you are installing a new operating system, you often need to change the boot order first. This tells your PC to load the installation files from a USB drive instead of the hard drive.
Hardware troubleshooting is another common reason. If your PC fails to recognize a new RAM stick or hard drive, checking BIOS can reveal whether the component is detected at all. You can also use BIOS to reset hardware settings that may have been corrupted by a driver conflict or system crash.
Security-conscious users also benefit from BIOS access. You can enable or disable secure boot, set up BIOS passwords, and configure trusted platform module settings. These features add an extra layer of protection to your Windows 11 system.
Even performance enthusiasts find BIOS useful. Adjusting power profiles, enabling XMP for faster RAM, and tweaking CPU power limits are all done from the firmware menu. Whether you are a casual user or a power user, knowing how to enter BIOS gives you more control over your computer.
Frequently Asked Questions
Can I open BIOS on Windows 11 without restarting?
No, you need to restart or turn on your computer to access BIOS. However, you can use the Windows Advanced Startup menu to restart directly into the firmware settings without needing to press a key at the right moment. This method works from inside Windows 11 and is very convenient.
What should I do if my BIOS key does not work?
Try a different key for your brand, such as Del or F2. Also, make sure you are using a wired keyboard and that you start pressing the key immediately after turning on your PC. If the problem persists, you can use the Windows Advanced Startup method as a reliable alternative to enter BIOS on Windows 11.
Is it safe to change BIOS settings?
Yes, it is generally safe as long as you know what you are changing. Always write down or photograph your original settings before making any adjustments. Avoid changing settings you do not understand, and only adjust options you need for a specific task like booting from a USB drive or enabling virtualization.
Can I access BIOS from the Windows 11 Settings app?
Yes, you can. Go to Settings > System > Recovery, then click Restart now under Advanced startup. From the blue menu, choose Troubleshoot > Advanced options > UEFI Firmware Settings. This will restart your PC directly into the BIOS setup utility without needing any keyboard shortcuts.
Why does my PC skip the BIOS key prompt?
This usually happens because of Fast Startup being enabled in Windows 11. Fast Startup bypasses the full boot process, which can skip the BIOS key window. Disabling Fast Startup in your power settings usually fixes this issue and allows you to access BIOS normally during startup.
What is the difference between BIOS and UEFI?
Traditional BIOS is an older firmware interface with a text-based menu. UEFI is the modern replacement that offers a graphical interface, mouse support, and faster boot times. Most Windows 11 computers use UEFI firmware. When people refer to BIOS today, they typically mean the UEFI settings on their PC.
Conclusion
Knowing how to open BIOS on Windows 11 during startup is a valuable skill for any computer user. Whether you need to change boot settings, troubleshoot hardware, or tweak performance options, accessing your firmware menu gives you direct control over your system. The methods in this guide cover every scenario, from keyboard shortcuts to the built-in Windows Advanced Startup path.
Start with the keyboard shortcut method if you are comfortable with timing. Use the Windows Settings method if you prefer a more reliable approach. Keep the brand-specific key table handy so you always know which key to press. And remember to avoid the common mistakes we discussed to save yourself frustration.
With a little practice, entering BIOS will become second nature. You will wonder why you ever hesitated. Explore your firmware settings with confidence, and take full control of your Windows 11 PC. The knowledge you gain from this guide will serve you well every time you need to access BIOS during startup.